Wednesday, 28 January 2015

Heartfelt Creations - Blue Bird and Blooms

Good Evening All! Hope you are all well and keeping safe in this January weather. I got soaked this morning and my umbrella was blown inside out.  My niece's umbrella broke and ended up stuck in her hair!  Was very glad to get home for a nice hot cup of tea!
As it is Wednesday, here is my project this week for Heartfelt Creations.  I took a photo of my work in progress once again at the start.  So from this.....


to this very CAS card.


Card Size :    12cm x 12 1/2cm (4 3/4" x 5").
Instructions:
Dry emboss a piece of white card using the brick wall embossing folder.  Cut down to measure 
11 1/2cm x 12cm (4 1/2" x 4 5/8").  Run your scissors down the sides of the card to create a rough edge. Add to the main cardfront using foam pads. Select the message topper shown from the paper collection and die cut using the matching die.  Go around the edges with a light blue promarker. Add to the main card with foam pads.  Stamp the blossoming branch image onto white card using black memento ink, die cut using the matching die and colour using promarkers.  Shape the flowers using the shaping tools and add the blue beads to the centres. Add to the card using foam pads behind the branches and leaves, but glue the flowers direct to the card. Stamp the bird onto white card using black ink and heat emboss with clear embossing powder.  Die cut using the matching die, colour with the promarkers.  Adhere to the card using foam pads to complete.

As always, the products used can be found on the Heartfelt Creations blog,

Thanks for visiting me today,
Oksana
x


Thursday, 22 January 2015

Heartfelt Creations - Pink Birthday Blooms

Good Morning All! 
 Here is my project this week for Heartfelt Creations.  I took a photo of this card when I first started  putting the elements together.  I wanted it to be pinkish, pink flowers and a topper with pink in it.  So from this.....


to this ......my finished card!  So pleased with how it turned out!


Card Size :   10 1/2cm x  13 1/2cm (4 1/8" x 5 3/8"). 
Instructions:
Select the card topper shown from the paper collection and cut out.  Add the pink ink around the edges and heat emboss using clear embossing powder.  Create a card blank with the above measurements and adhere the topper central using double sided tape.  Stamp the sentiment onto white card using black ink and heat emboss using clear embossing powder. Die cut using the largest oval die ensuring the sentiment is just off centre to the right.  Using the largest lacey oval die, die cut this shape using the pink card. Adhere these together using foam pads and add to the card using double sided tape.  Stamp the blossoms onto white card using pink ink and die cut using the matching die - do this 3 times.  Add yellow colouring the the centres and pink to the petals using the Fantastix blending tools.  Shape the flowers using the shaping tools and add the yellow beads to the centres. Die cut the leaves using the green felt. Add the leaves and flowers to the card as shown using hot glue to complete.

As always, the products used can be found on the Heartfelt Creations blog,

Thanks for visiting me today,
Oksana
x


Thursday, 15 January 2015

WOYWW (Thurdsay) - What's On Your Workdesk? # 293

Good Morning and thank you for the lovely comments on my card yesterday.
I thought I would participate in WOYWW (on Thursday) this week to share some work in progress.
These are some bits that are currently on my desk this week. In the first photo I have used the same stamp as yesterday but with distress inks.  Below, I have stamped, die cut then coloured with promarkers.
Need a few more elements and cardstock to finish these projects!


Thanks for visiting me today,
Oksana
x

Wednesday, 14 January 2015

Heartfelt Creations - Birds and Blooms Collage

Good Morning all on this cold, winter morning!
It is Wednesday and we have a new release today by Heartfelt Creations, the Birds and Blooms Collection.
For my project this week, I opted to use my gilding flakes as I had not used them in a while to create an elegant but simple card.  I also used cream linen card and when you apply the gilding flakes, they also take on the texture from the card! This card was difficult to photograph and looks much better when seen up close.


The products used can be found on the Heartfelt Creations blog, along with more ideas and inspiration from the design team this week.


Card Size :  13 1/2cm x 17cm (5 1/2" x 6 3/4").
Instructions:
Stamp the collage image onto cream linen card using the flitterglu and apply the gilding flakes. Using the largest Matting Basics die, die cut a frame from the same cream card.  Cut down to the size required, Adhere over the main image using foam pads.  Cut down to leave a small border around the frame - mine measured 13 1/2cm x 17cm (5 1/2" x 6 3/4").  Create a loopy bow on the bow maker and tie around the card frame. Add a separate piece of card to the back to complete the card.

As always, the products used can be found on the Heartfelt Creations blog,

Thanks for visiting me today,
Oksana
x


I would like to enter my card into the following challenges:
UK Challenge blog - Clean and Simple
Craft Stamper - Take A Stamp

Thursday, 8 January 2015

Heartfelt Creations - Flourished Lattice

Good Morning All! 
Here is my project this week for Heartfelt Creations.  The card was inspired by the faux laser cut technique that Jennifer McGuire shares in her tutorial.  I wanted to give it a try with my Heartfelt Creations dies and I love the result!

The products used can be found on the Heartfelt Creations blog, along with more ideas and inspiration from the design team this week. If you head over, you will see that  Heartfelt Creations has new branding and new packaging for 2015! Exciting times and there is also a sneak peak of the new release - Birds and Blooms Collection!


Card Size :   12 1/2cm x 14 1/2cm (4 7/8" x 5 5/8").
Instructions:
Create a card blank from cream linen card. Cut a separate piece of the same cardstock to measure 12cm x 14cm (4 5/8" x 5 3/8").  Centre the Lattice piece die and die cut.  Die cut 2 Large flourishes from the same card stock.  Adhere one flourish on the reverse securing with glue.  Use the other flourish to fill in the area until filled as shown, cutting down pieces to fit. (I used this tutorial ). Add foam pads to the reverse and cover the aperture with green cardstock.  Adhere into place onto the main card front. Die cut a Large Juliet flower, form into shape and secure with the green brad. Die cut the daisy cluster twice from yellow card stock. Snip off the flowers and mould into shape. Adhere to the flower centres with glue and add a green gem. Create a loopy bow on the bow maker, Adhere the bow and flower to the main card front using hot glue to complete.

As always, the products used can be found on the Heartfelt Creations blog,

Thanks for visiting me today,
Oksana
x


Saturday, 3 January 2015

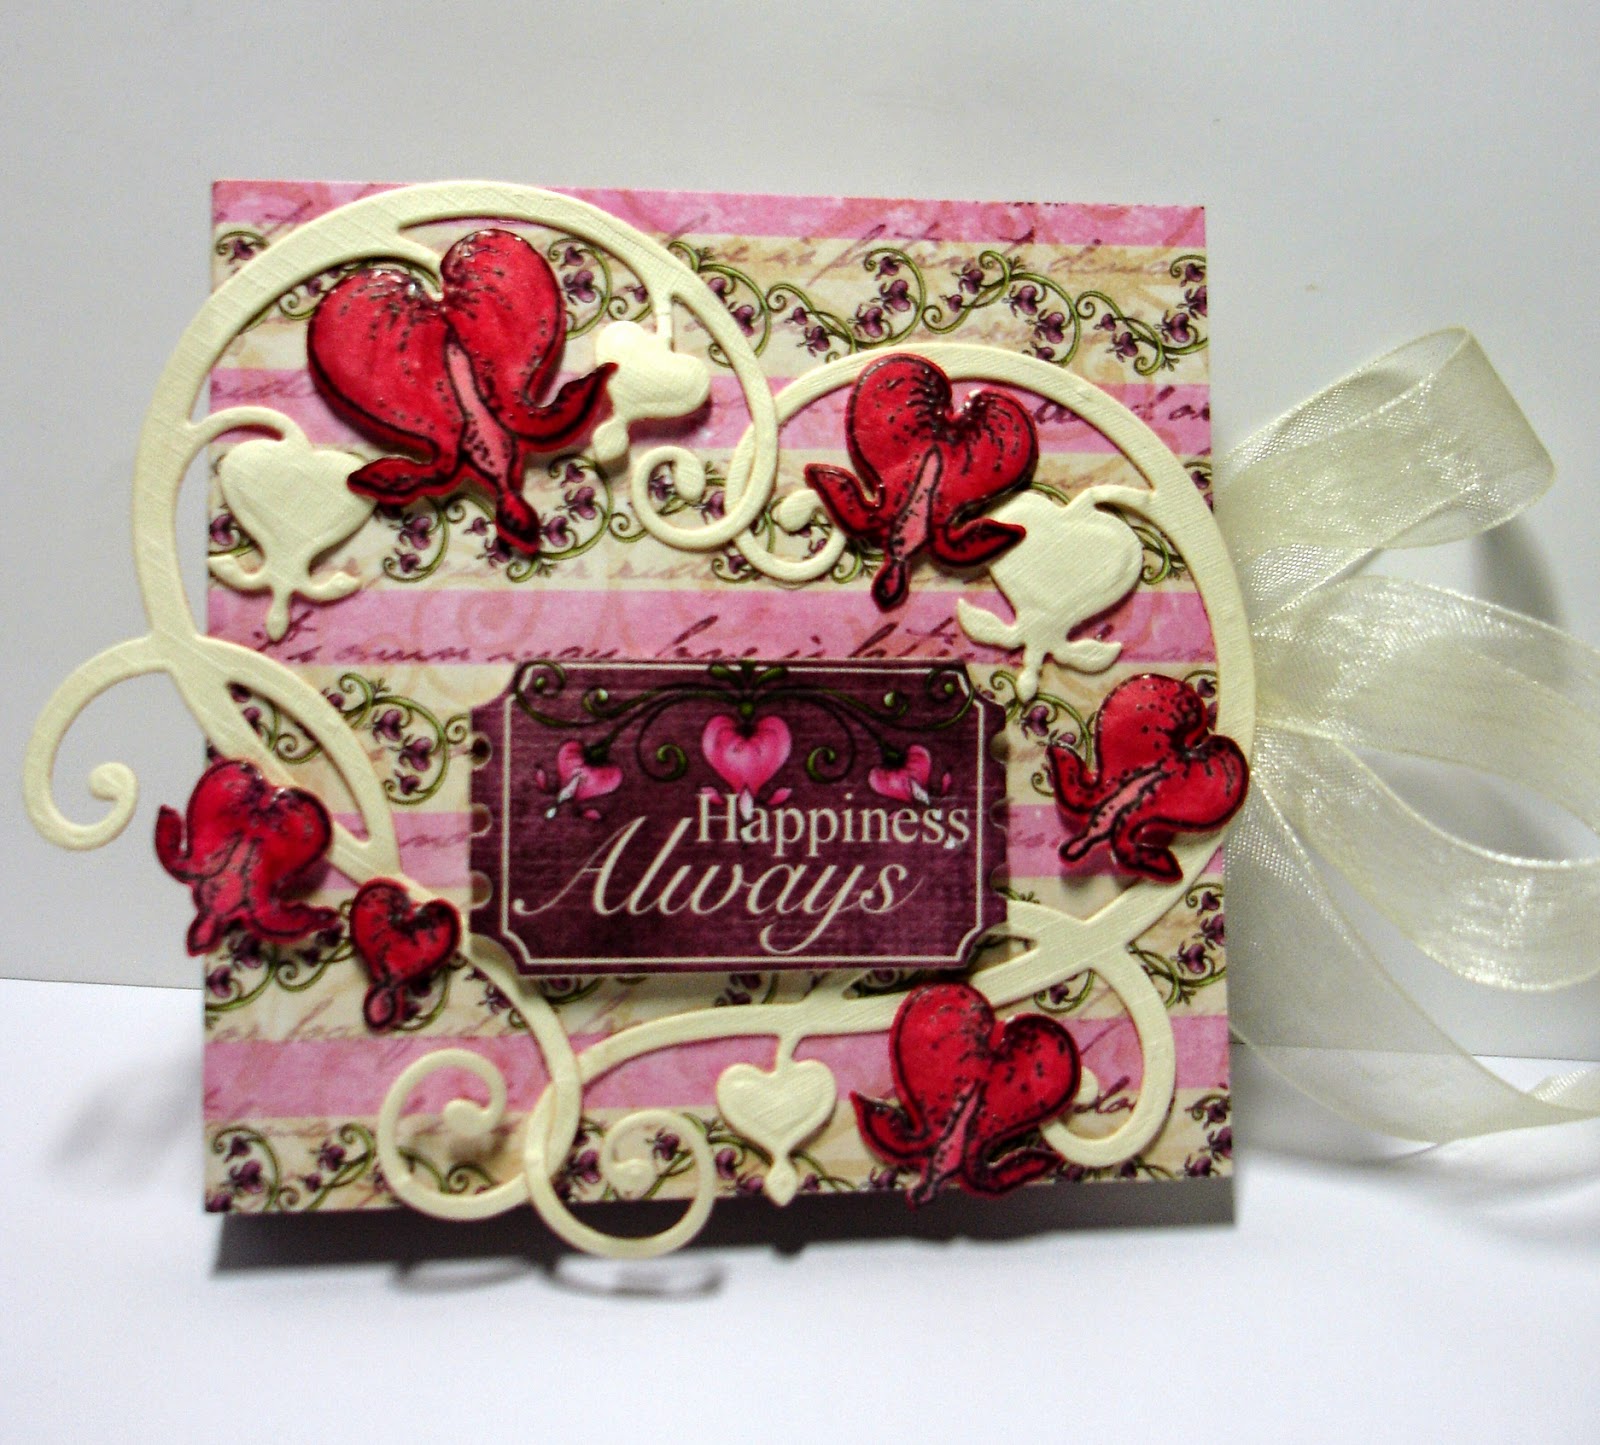
Heartfelt Creations - Tea Bag Holder

Good Evening All and Happy New Year! Hope that you all had a wonderful Christmas and enjoyed your New Year celebrations!
Here is my project this week for Heartfelt Creations using the latest collection.  I made a Tea Bag Holder using papers and dies from The Romantique Garden Collection. Really pleased with how it has turned out and it was easy to create.  I have filled mine with 2 individually wrapped tea tags, but you could also put chocolates in there too - could make it into a small Valentine's gift!


The products used can be found on the Heartfelt Creations blog, along with more ideas and inspiration from the design team.  Instructions are below.


Instructions:
Use this tutorial to create the Tea Bag Holder.  Select the paper shown from the paper collection to make the inner part.  Use white card to create the outer holder, then cover with matching paper. Stamp the flower blossoms with black ink and heat emboss with clear embossing powder.  Use your promarkers to colour the flower blossoms, use a blender to lighten some areas and add some dimension using a shaping tool. Adhere the tea bag holder together, adding some ribbon on the inside.  Die cut 2 branches from cream card.  Adhere into place on the front.  Arrange the blooms as shown, adhere using foam pads.  Die cut the sentiment using the ticket die.  Adhere into place using foam pads to complete.

Thanks for visiting me today,
Oksana
x


Wednesday, 24 December 2014

Heartfelt Creations - Silver Snowflakes

Good Evening All on this Christmas Eve 2014!
Hope that you are all ready to enjoy the next few days of festivities with family and friends!
Today, my project on the  Heartfelt Creations blog is a Christmas card to wish you all a Happy
Christmas and Holiday Season Best Wishes!

The products used can be found on the Heartfelt Creations blog, along with many more ideas and inspiration from the design team this week.


Card Size :   10 1/2cm x 10 1/2cm (4 1/4" x 4 1/4")
Instructions:
Create a card blank from white linen card. Emboss another piece of white linen card using the dotty embossing folder.  Cut down to measure 10cm x 10cm (3 7/8" x 3 7/8").  Run your scissors down the sides of this piece to create a rough edge.  Die cut 3 snowflakes from white card.  Dip the snowflakes into the versamark ink and heat emboss using silver powder. ( Do this twice).  Adhere silver twine of different lengths to card securing on the reverse.  Add this piece to the main card front using foam pads.  Die cut the sentiment using the Classic Ticket Die.  Add the sentiment to the card using foam pads. Arrange the snowflakes around the sentiment as shown adhering with foam pads and hot glue.


The products used can be found on the Heartfelt Creations blog, along with more ideas and inspiration from the design team.


Thanks for visiting me today,
Oksana
x


I would like to enter my card into the following challenges:
UK Challenge Blog - Christmas
CAS on Sunday - Christmas


Friday, 12 December 2014

Heartfelt Creations - Romantique Birds

Good Morning All! We are getting very close to Christmas now, where has all the time gone? I still have so much to prepare and get ready and no tree up yet! When I was growing up, we used to put up the tree on my Birthday as this then counted down the 12 days to Christmas! Hoping to do it one day next week to make the house more festive whilst making more dried orange decorations - just love the smell around the home from them! Made some a few years ago and they have lasted, just need to make some more to give as little presents.

Here is my project this week for Heartfelt Creations.  A very, very simple quick and easy card to create, with a little silver twine to complete.  I have added glitter accents to the flowers, but it was really difficult to photograph - it is there I promise!

 The products used can be found on the Heartfelt Creations blog, along with more ideas and inspiration from the design team.  Instructions are below.


Card Size :   12 1/2cm x 12 1/2cm (4 7/8" x 4 7/8")
Instructions:
Create a card blank from white card.  Select the paper shown from the paper collection and cut to measure the card front size. Add pink ink around the edges and heat emboss with clear powder. Adhere to the card front using double sided tape. Create a loopy bow using silver twine on the bow maker, add to the card corner as shown.  Secure on the reverse. (I made a tiny hole on the top fold and threaded the cord through).  Add silver twine to the oppopsite corner too.  Add glitter highlights to the flowers and flower centres using a glitter pen. 


The products used can be found on the Heartfelt Creations blog, along with more ideas and inspiration from the design team.


Thanks for visiting me today,
Oksana
x


I would like to enter my card into the following challenge:
Crafty Hazelnut's Patterned Paper - Anything Goes

Thursday, 4 December 2014

Heartfelt Creations - Romantique Swans Swimming

Good Morning All! Hope you are all feeling festive now that we are in December? I have my Birthday this month too, which  gets mixed up in all the festive preparations!  I still have lots to do as always and the frosty weather is not helping!

Here is my project this week for Heartfelt Creations.  I wanted to use the beautiful swans and water stamps and created my own inked background.

This card is fairly easy to make and the instructions can be found below.  The products used can be found on the Heartfelt Creations blog, along with more ideas and inspiration from the design team.


Card Size :    11 1/2cm x 11 1/2cm (4 1/2" x 4 1/2")
Instructions:
Create a card blank using white card.  Cut a piece of white card to measure 10 1/2cm x 10 1/2cm 
(4" x 4").  Using stencil tape, create a narrow edged frame on your card. Using the ink dusters, gently add colour to the card. Begin with the pink, then add blue to the lower half.  Add black ink to the water stamp and stamp several times on the lower half - any gaps I filled in using a Promarker pen. Remove the stencil tape carefully.  Using a black Promarker (with a fine nib) and a piece of spare card, create a frame around your work. Cut another piece of white card to cover the card front.  Use the ruler to create a pierced edge.  Adhere to the card using foam pads. Stamp the swans onto white card using black ink and heat emboss with clear powder. Die cut using the matching dies.  Add some detailing with a grey pen and colour in around the edges.  Add the main image to the card using foam pads and also the swans. Create a loopy bow from silver cord ribbon. Add to the card as shown.


The products used can be found on the Heartfelt Creations blog, along with more ideas and inspiration from the design team.


Thanks for visiting me today,
Oksana
x


I would like to enter my card into the following challenges:
UK Challenge Blog - Colouring
Graph'It Colour Challenge - Two Colors


Friday, 28 November 2014

Heartfelt Creations - Best Wishes

Good Afternoon All and Welcome this Friday!
Today, Heartfelt Creations have released the Romantique Garden Collection on their website with some Special Black Friday Offers!

My project on the blog today is a card made with the sentiment as the focal point. I thought it really stood out on the black card when I heat embossed it using white embossing powder.

The products used can be found on the Heartfelt Creations blog, along with many more ideas and inspiration from the design team this week.


Card Size :    12cm x 12cm (4 3/4" x 4 3/4")
Instructions:
Select the paper shown from the paper collection and cut to measure the card front. Add pink ink around the edges and heat emboss with clear powder. Adhere to the card front using double sided tape. Stamp the sentiment onto black card using VersaMark ink, heat emboss using fine white embossing powder. Die cut using the second largest circle die. Die cut a lattice piece from pink card. Adhere to the sentiment using glue.  Adhere to the centre of the card front using foam pads. Create a double bow using pink ribbon on the bow maker, add to the card using hot glue. Add the pearl to complete.

The products used can be found on the Heartfelt Creations blog, along with more ideas and inspiration from the design team.


Thanks for visiting me today,
Oksana
x


I would like to enter my card into the following challenges:
Craft-Dee BowZ - Anything Goes with a Handmade Bow
Simon Says Stamp - Anything Goes